Want to track real-time weather conditions like a pro—without buying a commercial setup? Then it’s time to build a smart weather station that transforms your backyard into a live science lab. With a few sensors, some code, and a bit of nerdy ambition, you can log data like a true weather geek.
Here’s how to start monitoring rain, wind, humidity, and temperature—your way.
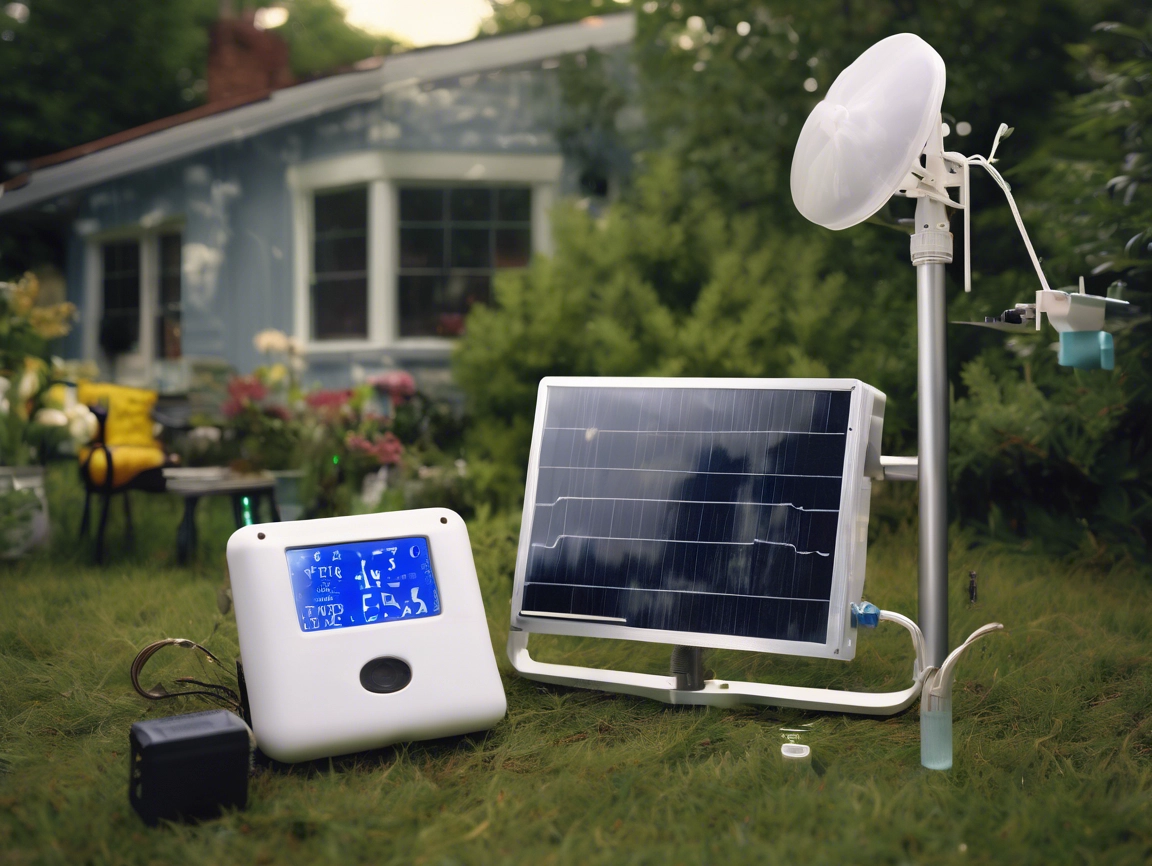
What You’ll Need to Build One
If you’re serious about personal weather data, start by gathering the essentials:
- Microcontroller board (Raspberry Pi or Arduino recommended)
- Sensors: temperature, humidity, barometric pressure, wind speed, rain gauge
- Wi-Fi module or Ethernet shield (ESP8266 works well)
- Power: rechargeable battery pack or small solar panel
- Weatherproof enclosure or mount
- Optional: LCD display, SD card, or online dashboard integration
Want a shortcut? Check out SparkFun, Adafruit, or Weather Underground for prebuilt sensor kits and dashboards.
Proper Setup = Reliable Results
To get useful readings, your sensor placement matters:
- Place temperature/humidity sensors in shaded, ventilated areas—not in direct sunlight.
- Mount wind sensors (anemometers) high and clear of obstructions like trees or buildings.
- Set up rain gauges level and out in the open.
- Keep pressure sensors indoors or in waterproof boxes to prevent corrosion.
Following guidelines like those from the National Weather Service helps your data align with broader weather networks.
Writing the Code to Log Data
Whether you’re using Python (Raspberry Pi) or C++ (Arduino), your script should:
- Read values from each sensor at regular intervals
- Apply conversions to get units like °F or mm
- Save the data locally or push it to cloud storage
- Optional: Trigger alerts if conditions meet certain thresholds
Open-source libraries like Adafruit DHT or BMP280 make it easier to interface with your hardware.
Visualizing Trends and Sharing Online
You didn’t go through all this trouble just to look at raw numbers.
Here are simple ways to make the data useful and shareable:
- Use ThingSpeak to create live graphs
- Set up dashboards with Grafana or Google Sheets
- Connect your data stream to IFTTT to control smart home devices or send alerts
Bonus idea: Compare your backyard data with local NOAA readings and track microclimate trends over time.
Optional Upgrades for Serious Nerds
Once you have the basics working, take your station to the next level:
- Power it fully with a solar panel array
- Add a camera and create time-lapse sky footage
- Use Home Assistant to automate garden watering
- Incorporate voice notifications with Alexa or Google Home
The best part? You can expand it however you want.
Final Thoughts: Build Smart, Stay Curious
Whether you’re watching for rain, heat waves, or just trying to outsmart your weather app, building a smart weather station is one of the most rewarding nerdy projects around. It gives you control over your data, teaches hands-on science, and adds personality to your outdoor setup.
Start simple. Build it out. And share your data with pride.
You really can build a smart weather station—and make it uniquely yours.